Shadow Tutorial & Freebie Shadow Styles!

Hello scrappers!! Kelley here to start out the week with a shadowing tutorial for you as well as a set of freebie shadow styles! The tutorial covers how to add dimension to your ellies like ribbons or strings. The freebie shadow style set includes 2 sets of styles – 1 for light papers and 1 for dark. I hope you enjoy!
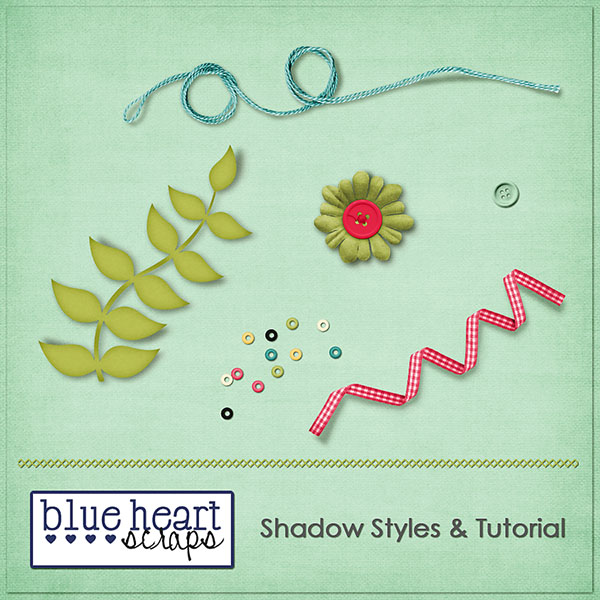
 

You can DL the freebie shadow styles set by clicking here.  🙂

Sooo, lets get started with the tutorial!

The first thing I always do when I shadow is place my item, then either click on the shadow style that I want to apply, or click on the fx button to apply a new shadow.  Using these styles, you’ll just click on the style’s button in your style palette.  For example, if you are placing a button on a light background paper, you’ll click on the button basic shadow style.  Once you apply a style, you can always edit that shadow to your liking selecting the layer you want to edit on your layers palette and then clicking the fx button and then drop shadow.  Just pull the sliders to adjust to your liking as usual.  That is the basics of shadowing – pretty simple.  If you aren’t sure how to do all that, don’t worry – I’m going to go over those steps in the tutorial below too.  🙂  For this tutorial, I wanted to show you a couple of things you can do to really make your elements appear 3 dimensional.  This works well for ribbons, strings – things with lots of loops, but you can also use it for flowers and other “puffy” items.  You can use the freebie shadows as is, or you can use the tutorial below to learn how to adjust your shadows exactly how you’d like them, and to add extra dimension.


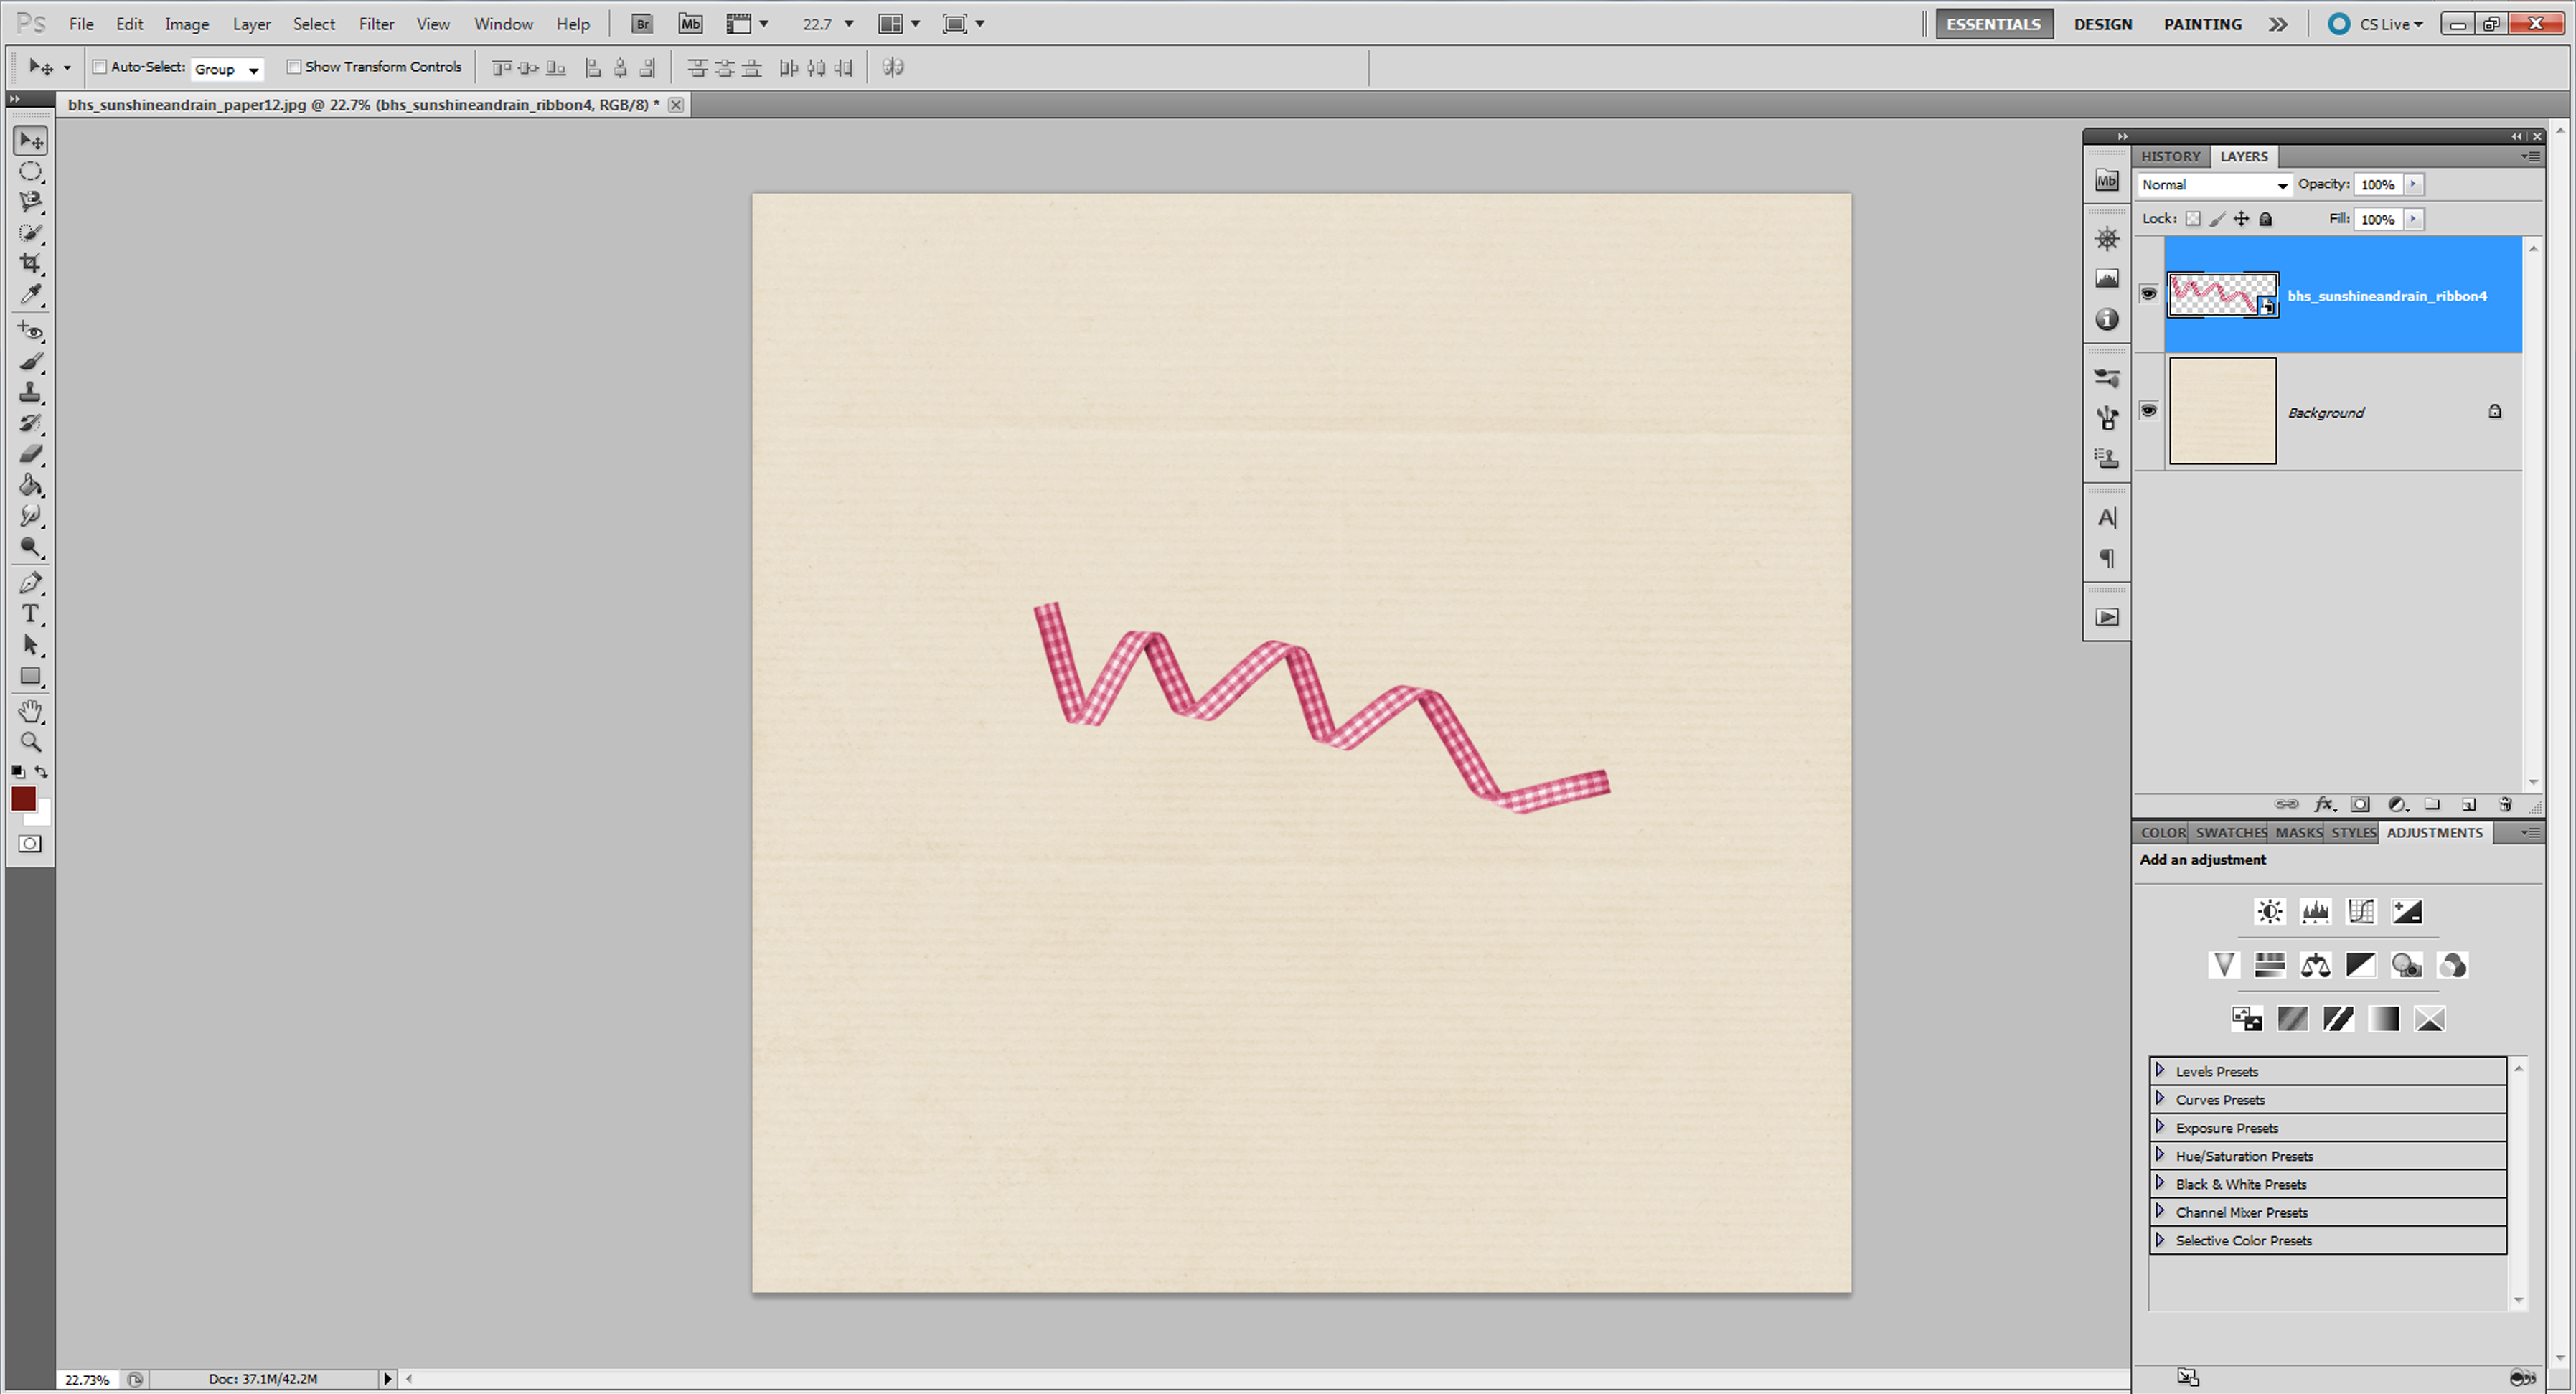
First, just go ahead and place a ribbon onto your paper.  You can also use a string if you’d like.
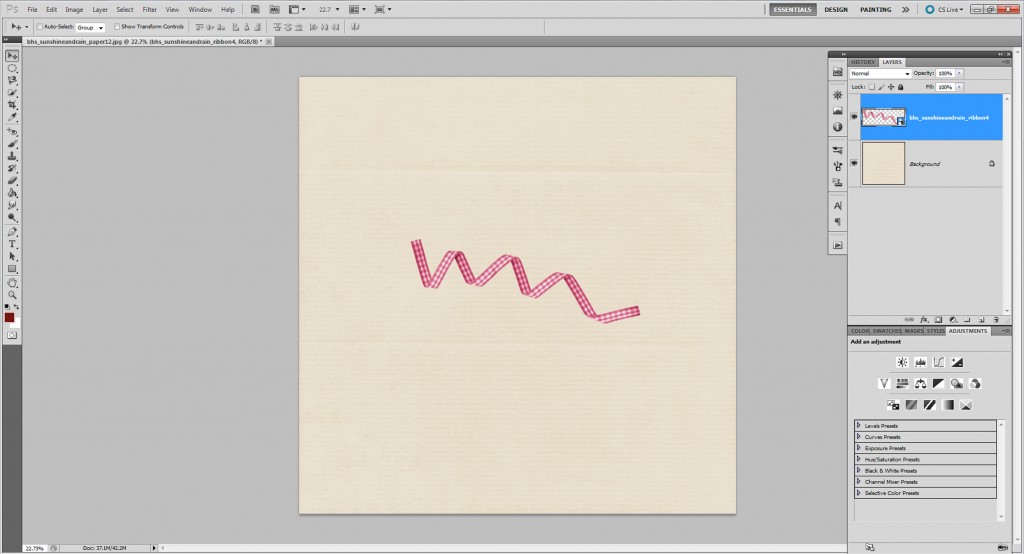
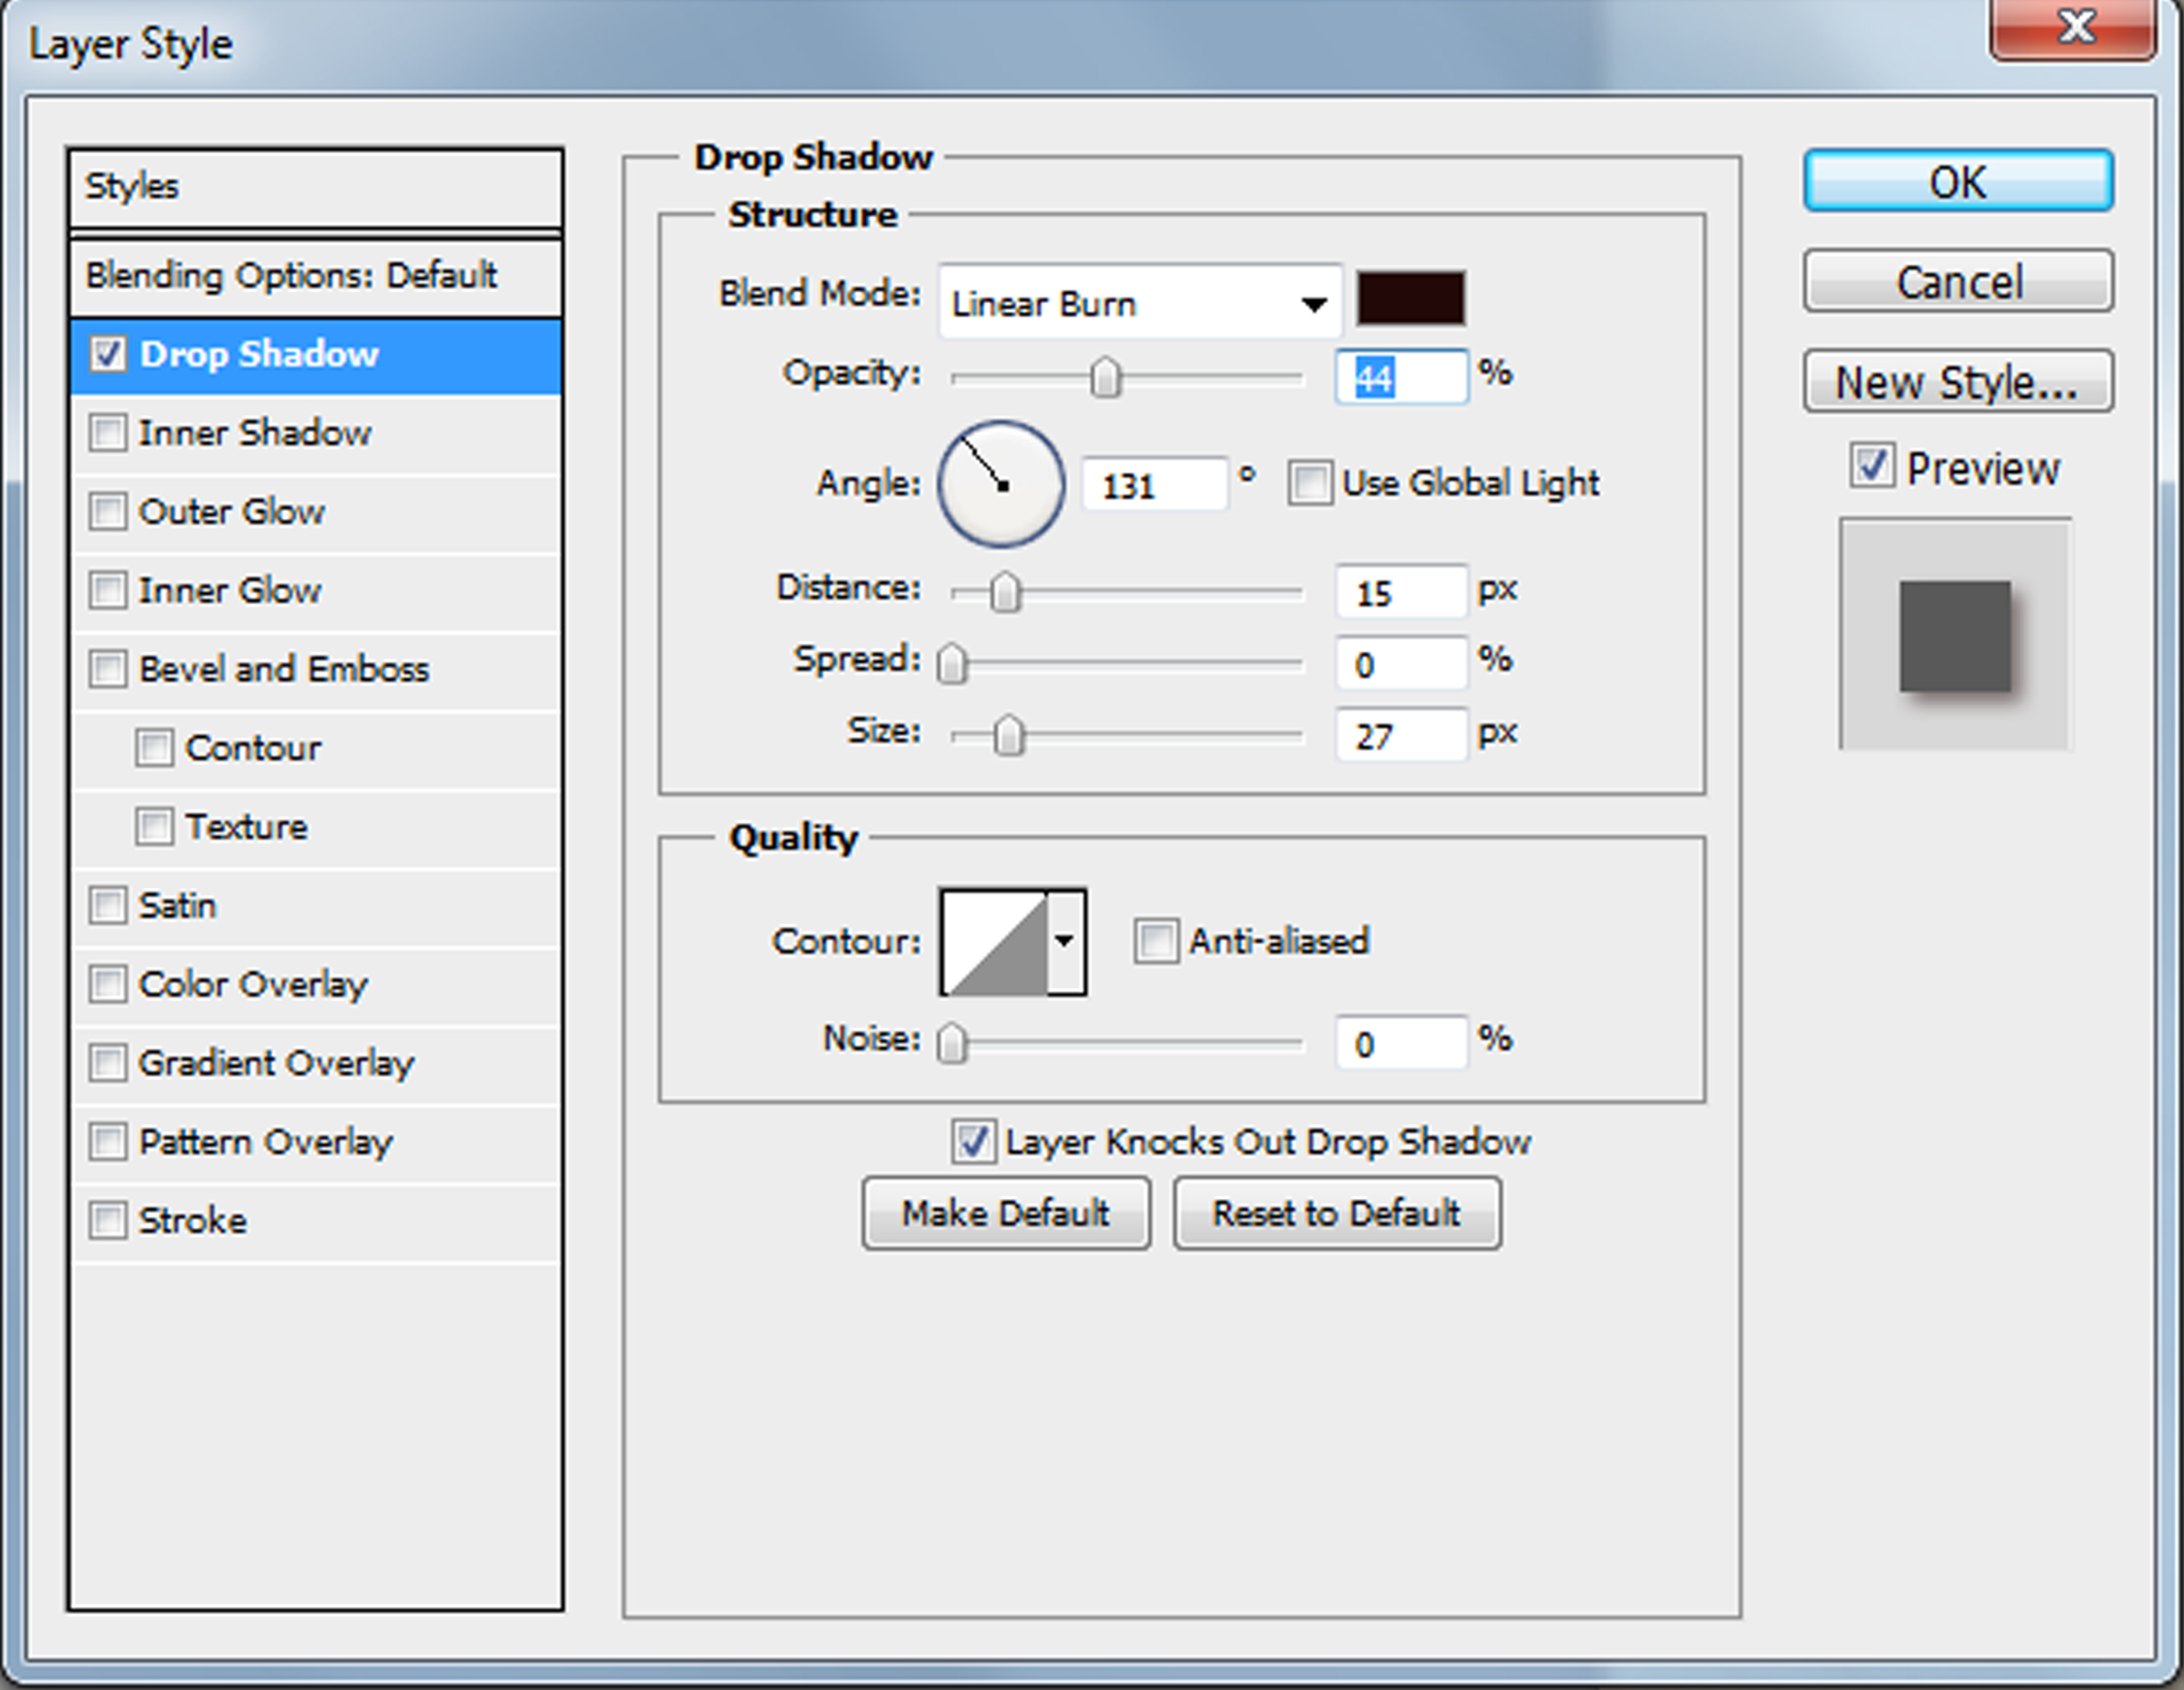
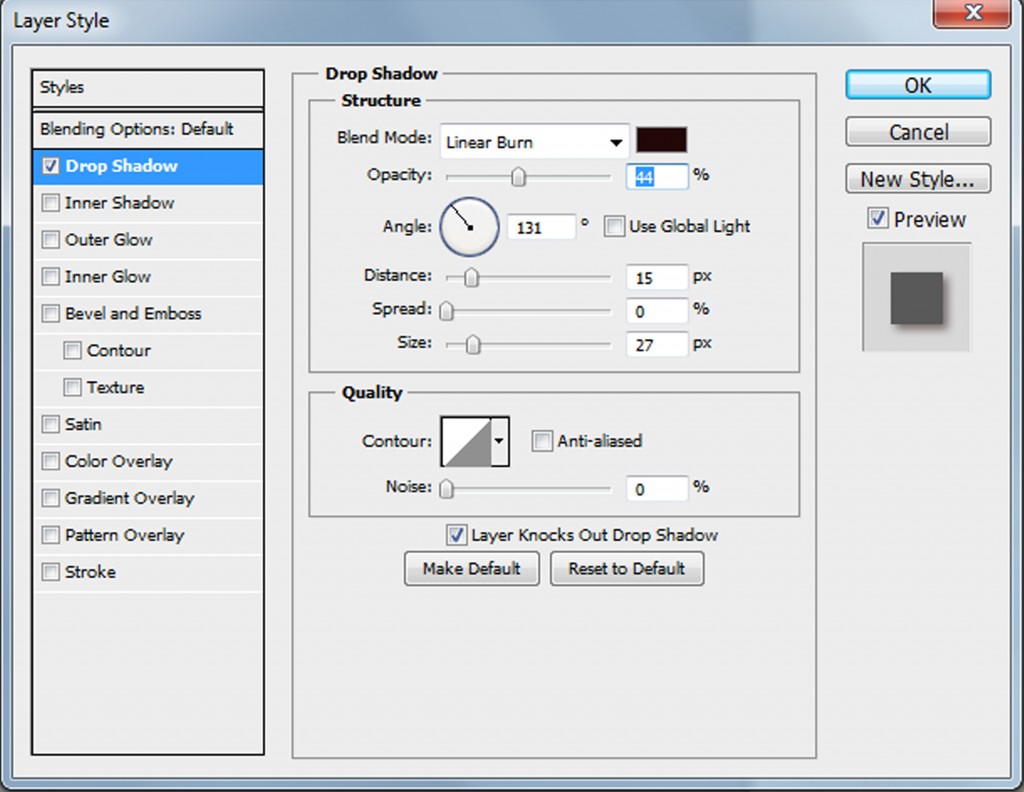
The next thing you’ll do is make sure you have that layer selected in your layers palette (see previous picture).  Then you can do 1 of 2 things – either select a style to apply to your element or click on fx – drop shadow.  In this case, I’d choose the ribbon basic shadow style for light paper.  If  you want to further adjust, click the fx -drop shadow option, and this window pops up.  There are several things going on here.  First you have the blend mode.  I always use linear burn.  I find it gives a more intense shadow, and it also picks up the color of whatever is underneath the item so it looks a bit more realistic.  A lot of people also use multiply, so feel free to try out other ones if you’d like.  Then is your opacity.  This basically lightens or darkens your shadow.  I keep it in the middle until I’ve got my other settings adjusted, then slide it to get the shadow just right.  The distance slider is where you adjust how far away your item/element is going to appear to be from the page.  A good rule of thumb here is that items on the bottom of the stack will have less distance because they are closer to the paper.  You can create all kinds of different looks by adjusting this.  If you want your page to look really paper scrapped, a short, clean distance works well.  If you want everything really dreamy and floaty, adjust the slider further to the right.  With the styles I’ve made here, you won’t have to mess with any of this if you don’t want to  – I’ve given you the basic shadows I use.  Then if you want to adjust, you can do so.  Okay, the last thing I mess with is the size slider which gives you a more crisp shadow if it is to the left, and a more blurry shadow to the right.   When you’ve got it how you want it, click ok.
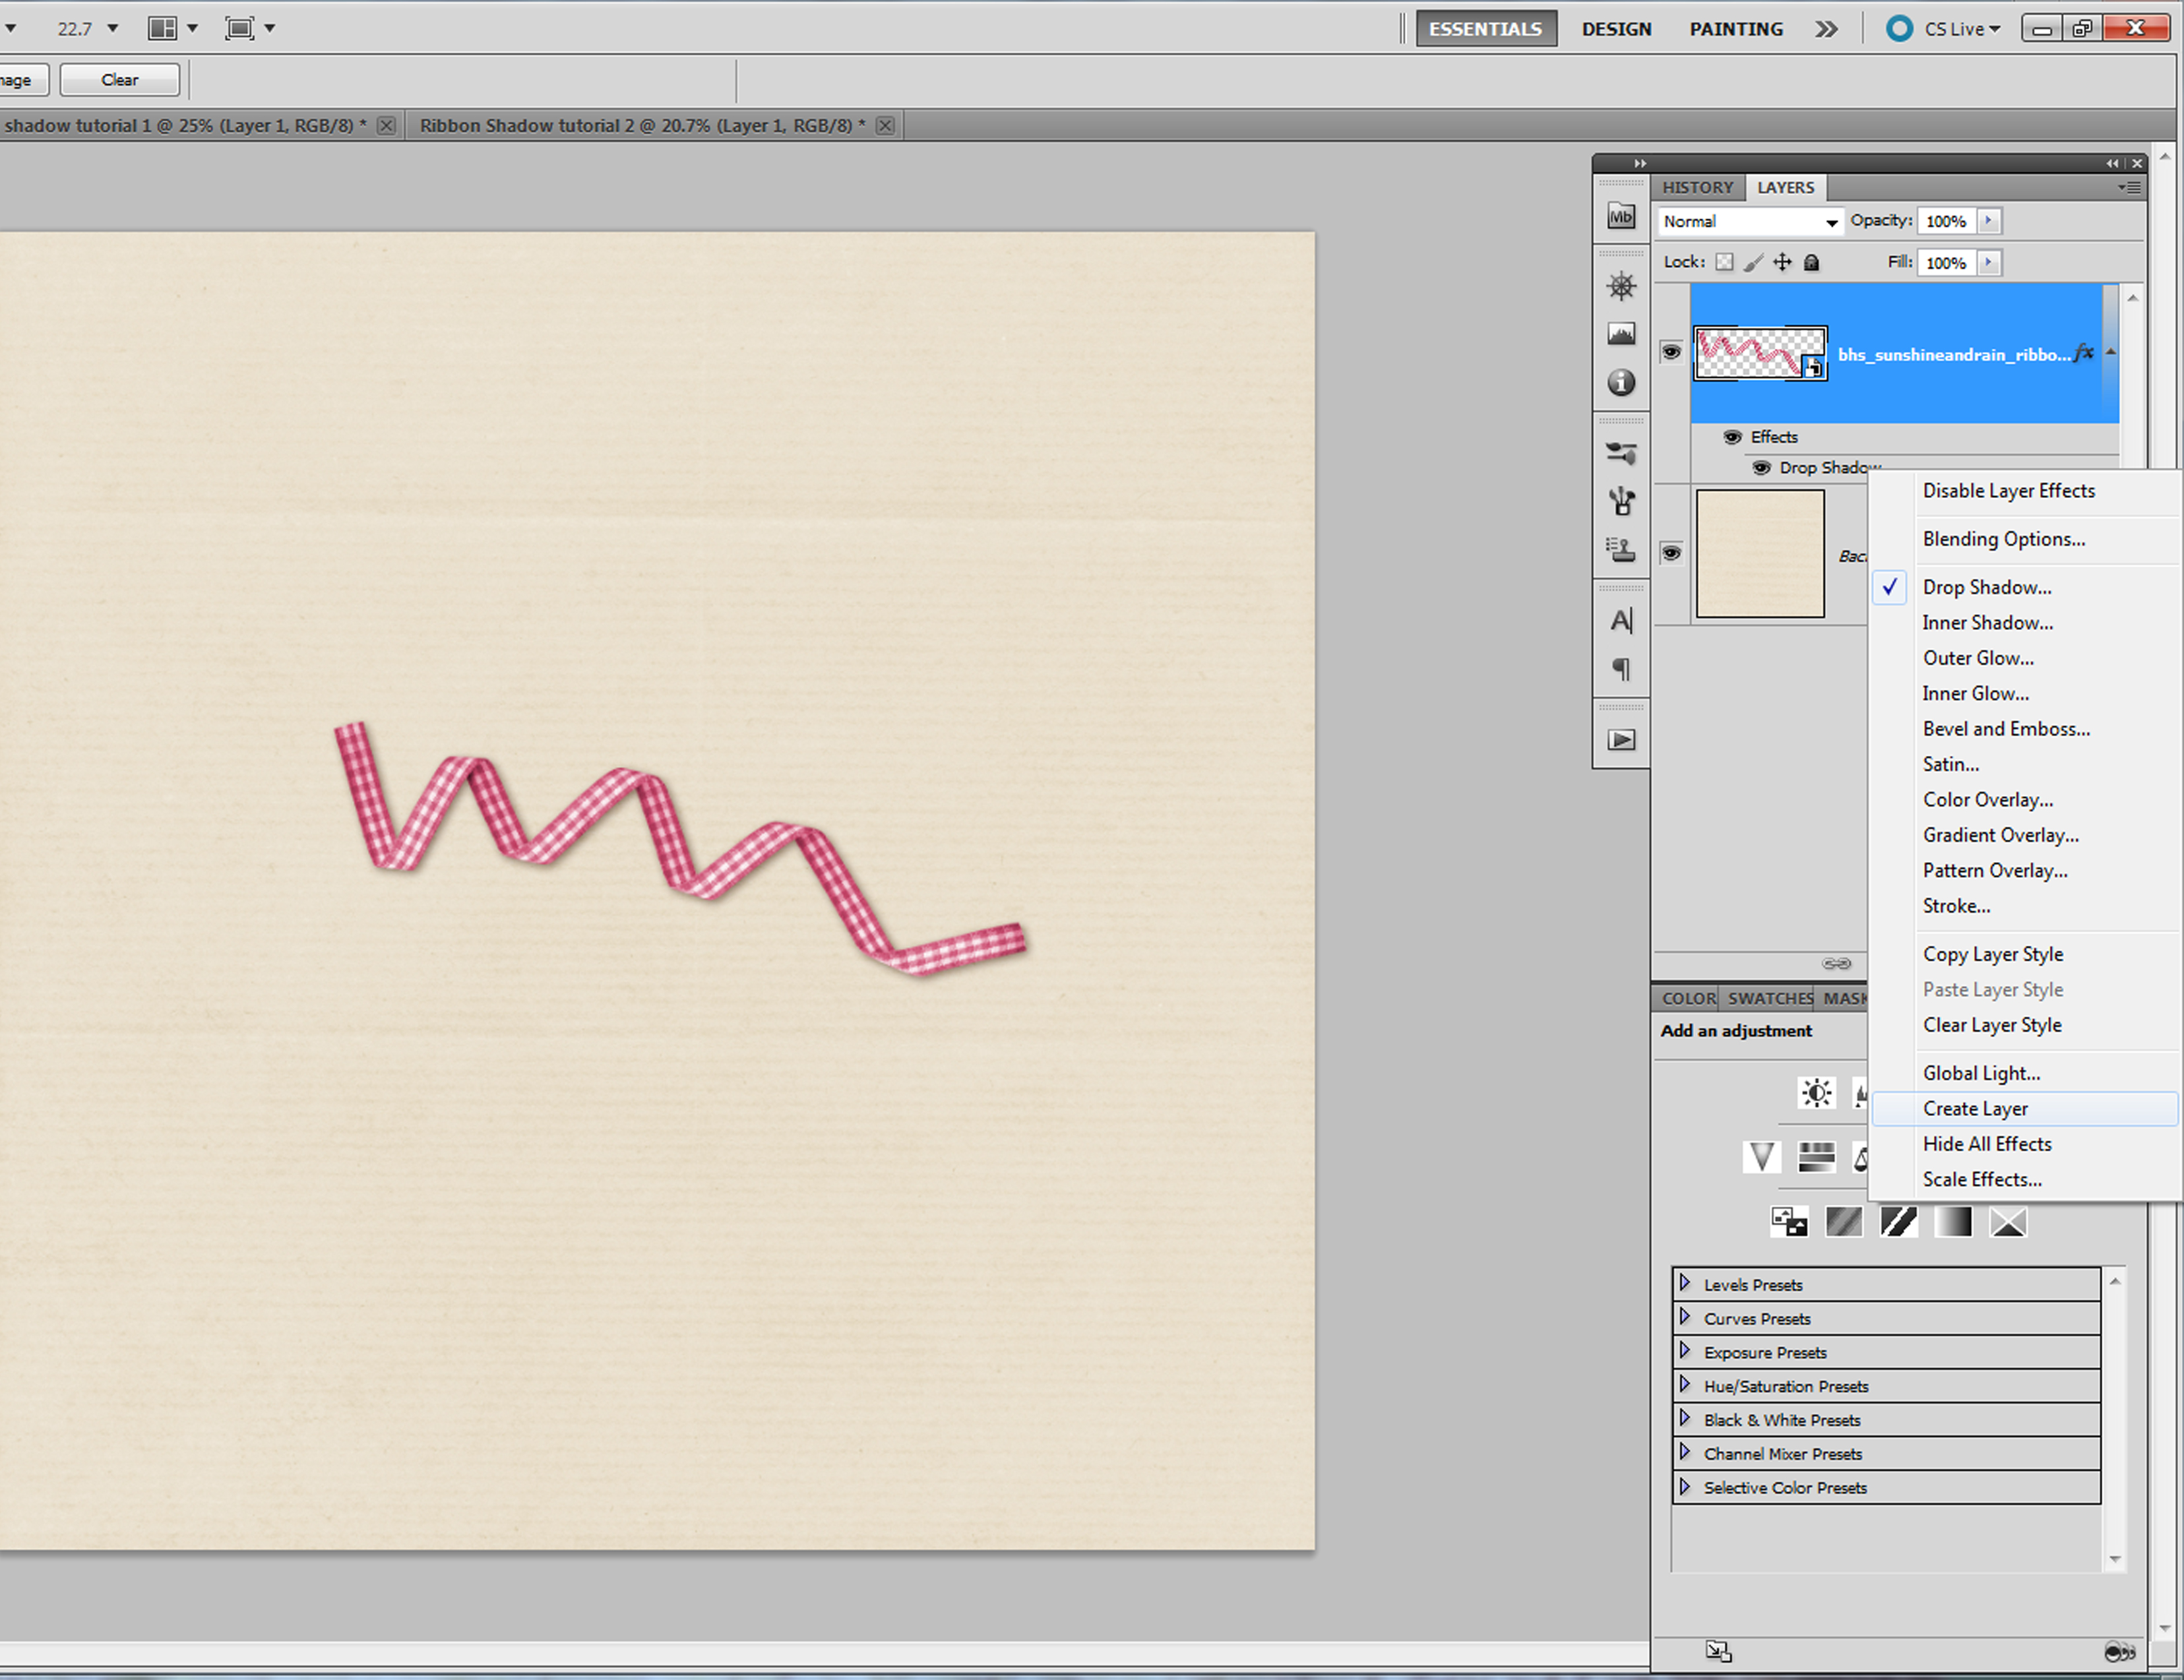
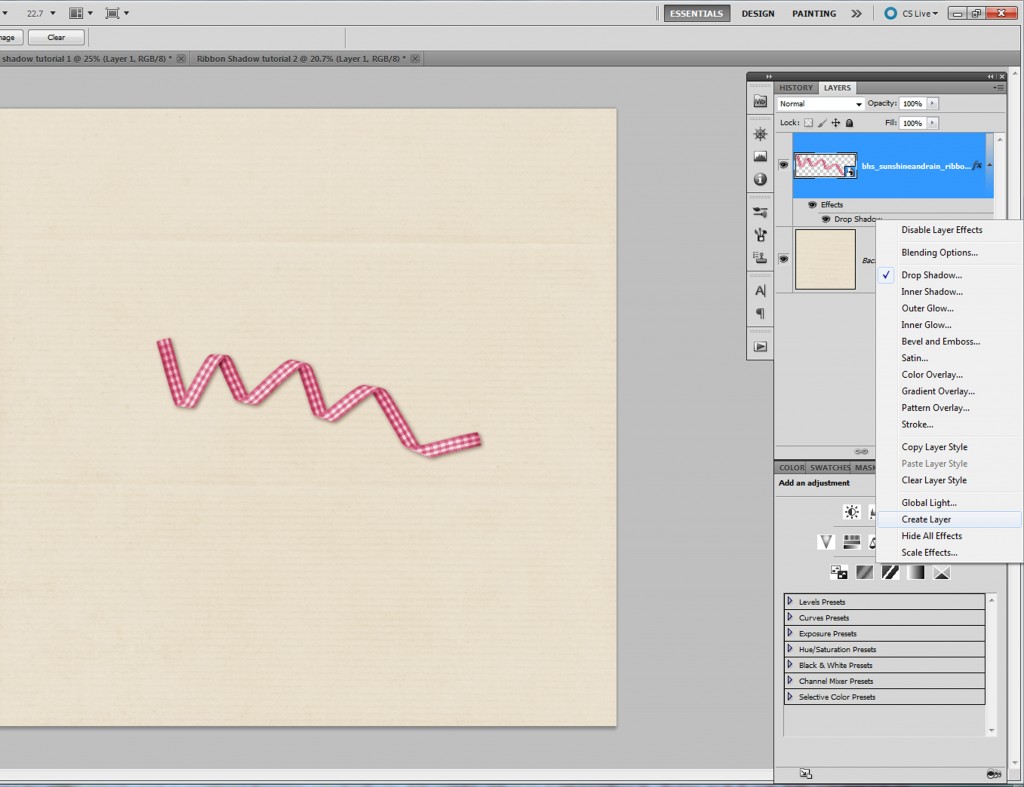
Okay, now we are going to start adding dimension to our ribbon.  I have my ribbon selected in my layers palette.  Now, right under the layer where it says drop shadow, I right click.  Go almost to the bottom of the list of choices and select “create layer.”   This gives us a separate layer with our shadow on it.
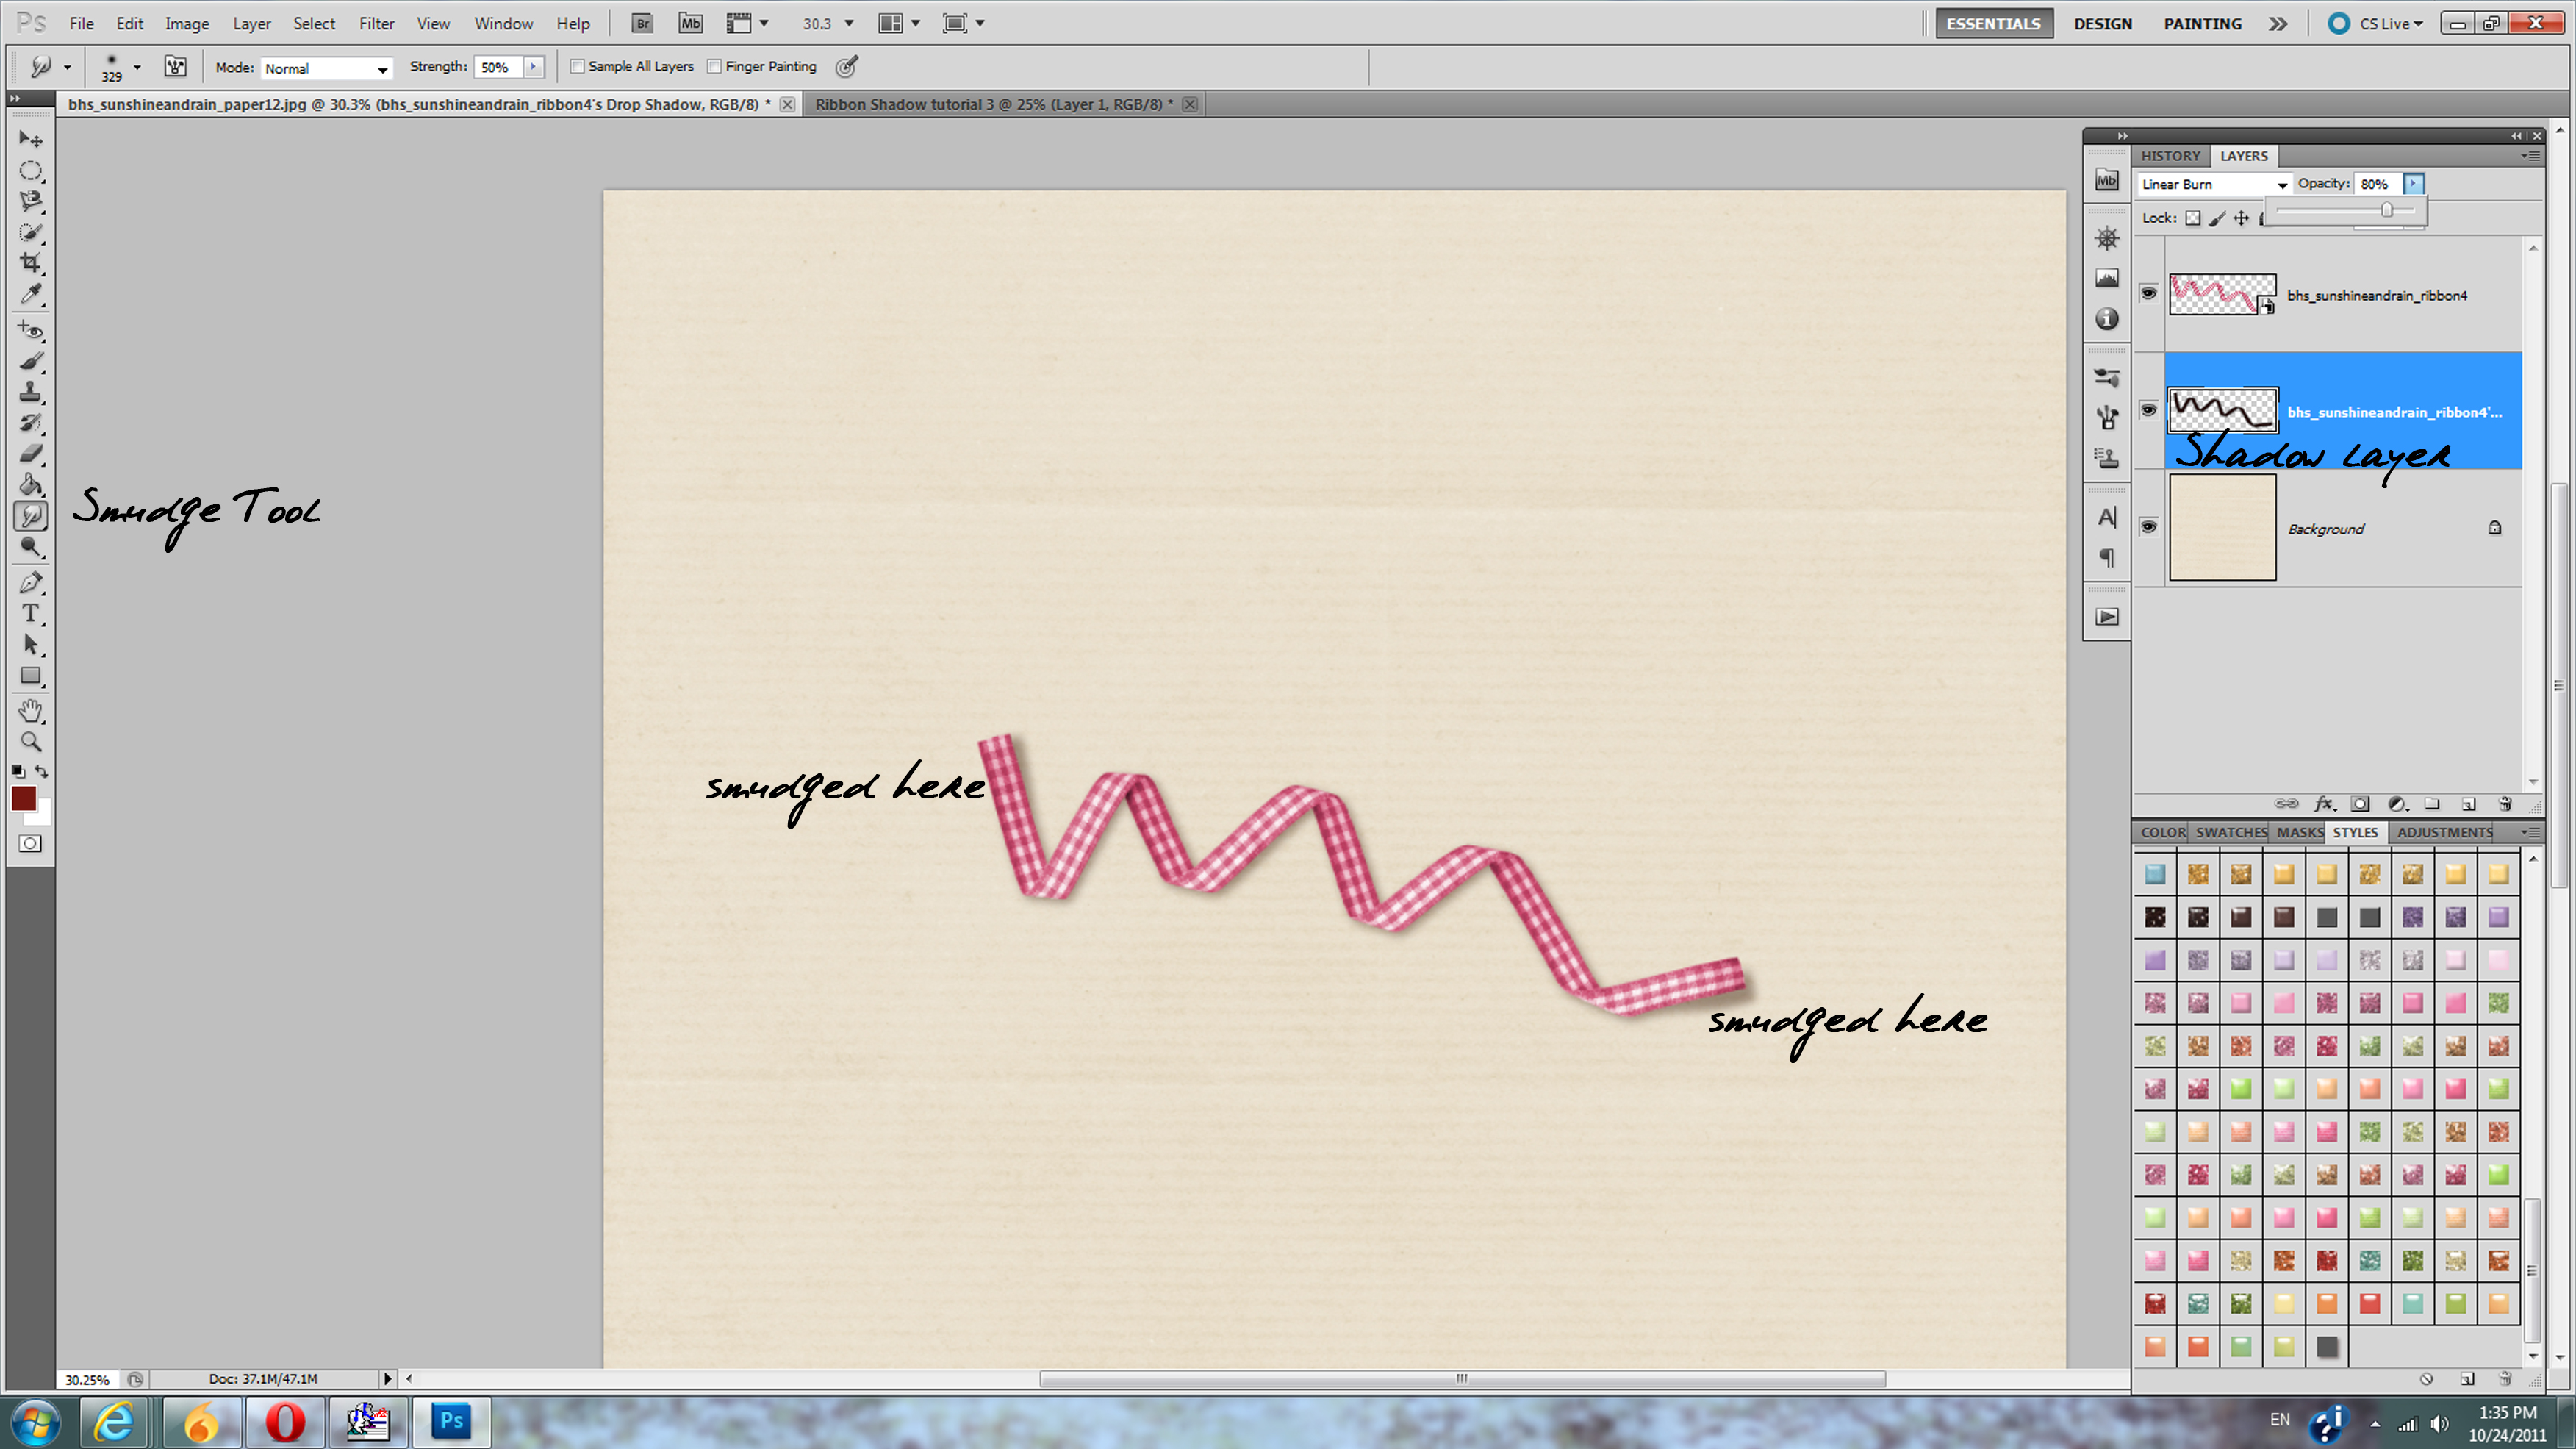
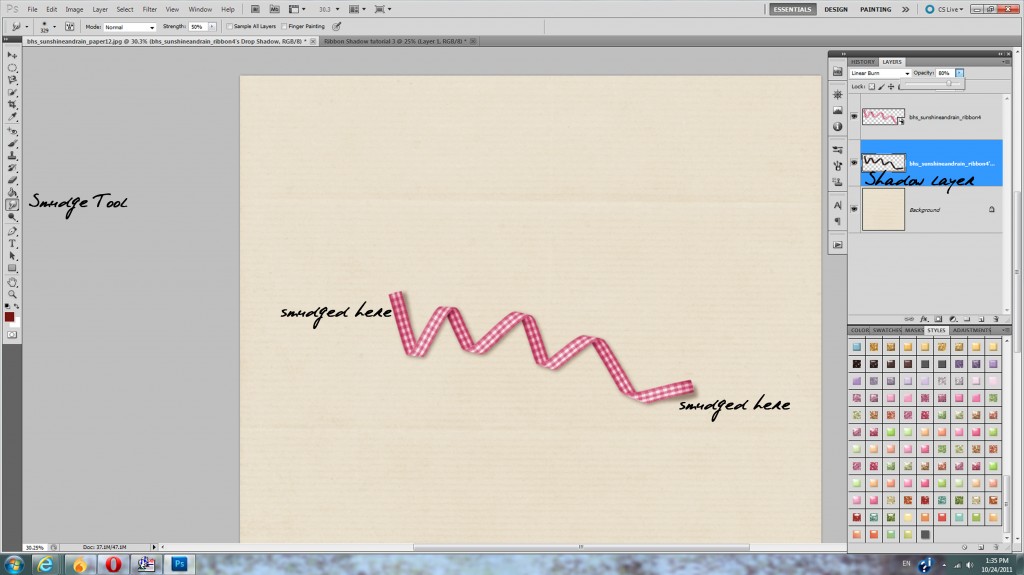
Now, select your shadow layer.  You will then go over to your toolbar and choose the smudge tool.  I’ve marked where the  smudge tool is located in the picture below.  You’ll want to play around with your brush size to get the look you want, but I usually use around a size 300 soft brush.  You can change the brush at the top of the screen in the options listed.  Then, just take your smudge tool and push the shadow around in parts where you want it to appear that the ribbon is coming up off the paper.  In the pic below, I did the ends of the ribbons.  You can do as much or as little as you want.  The key with the smudge tool is to do small bits at a time, slowly.  Every smudge is not going to look like you want, so then you can do a quick undo when needed.  Just keep on smudging until your shadow looks good.
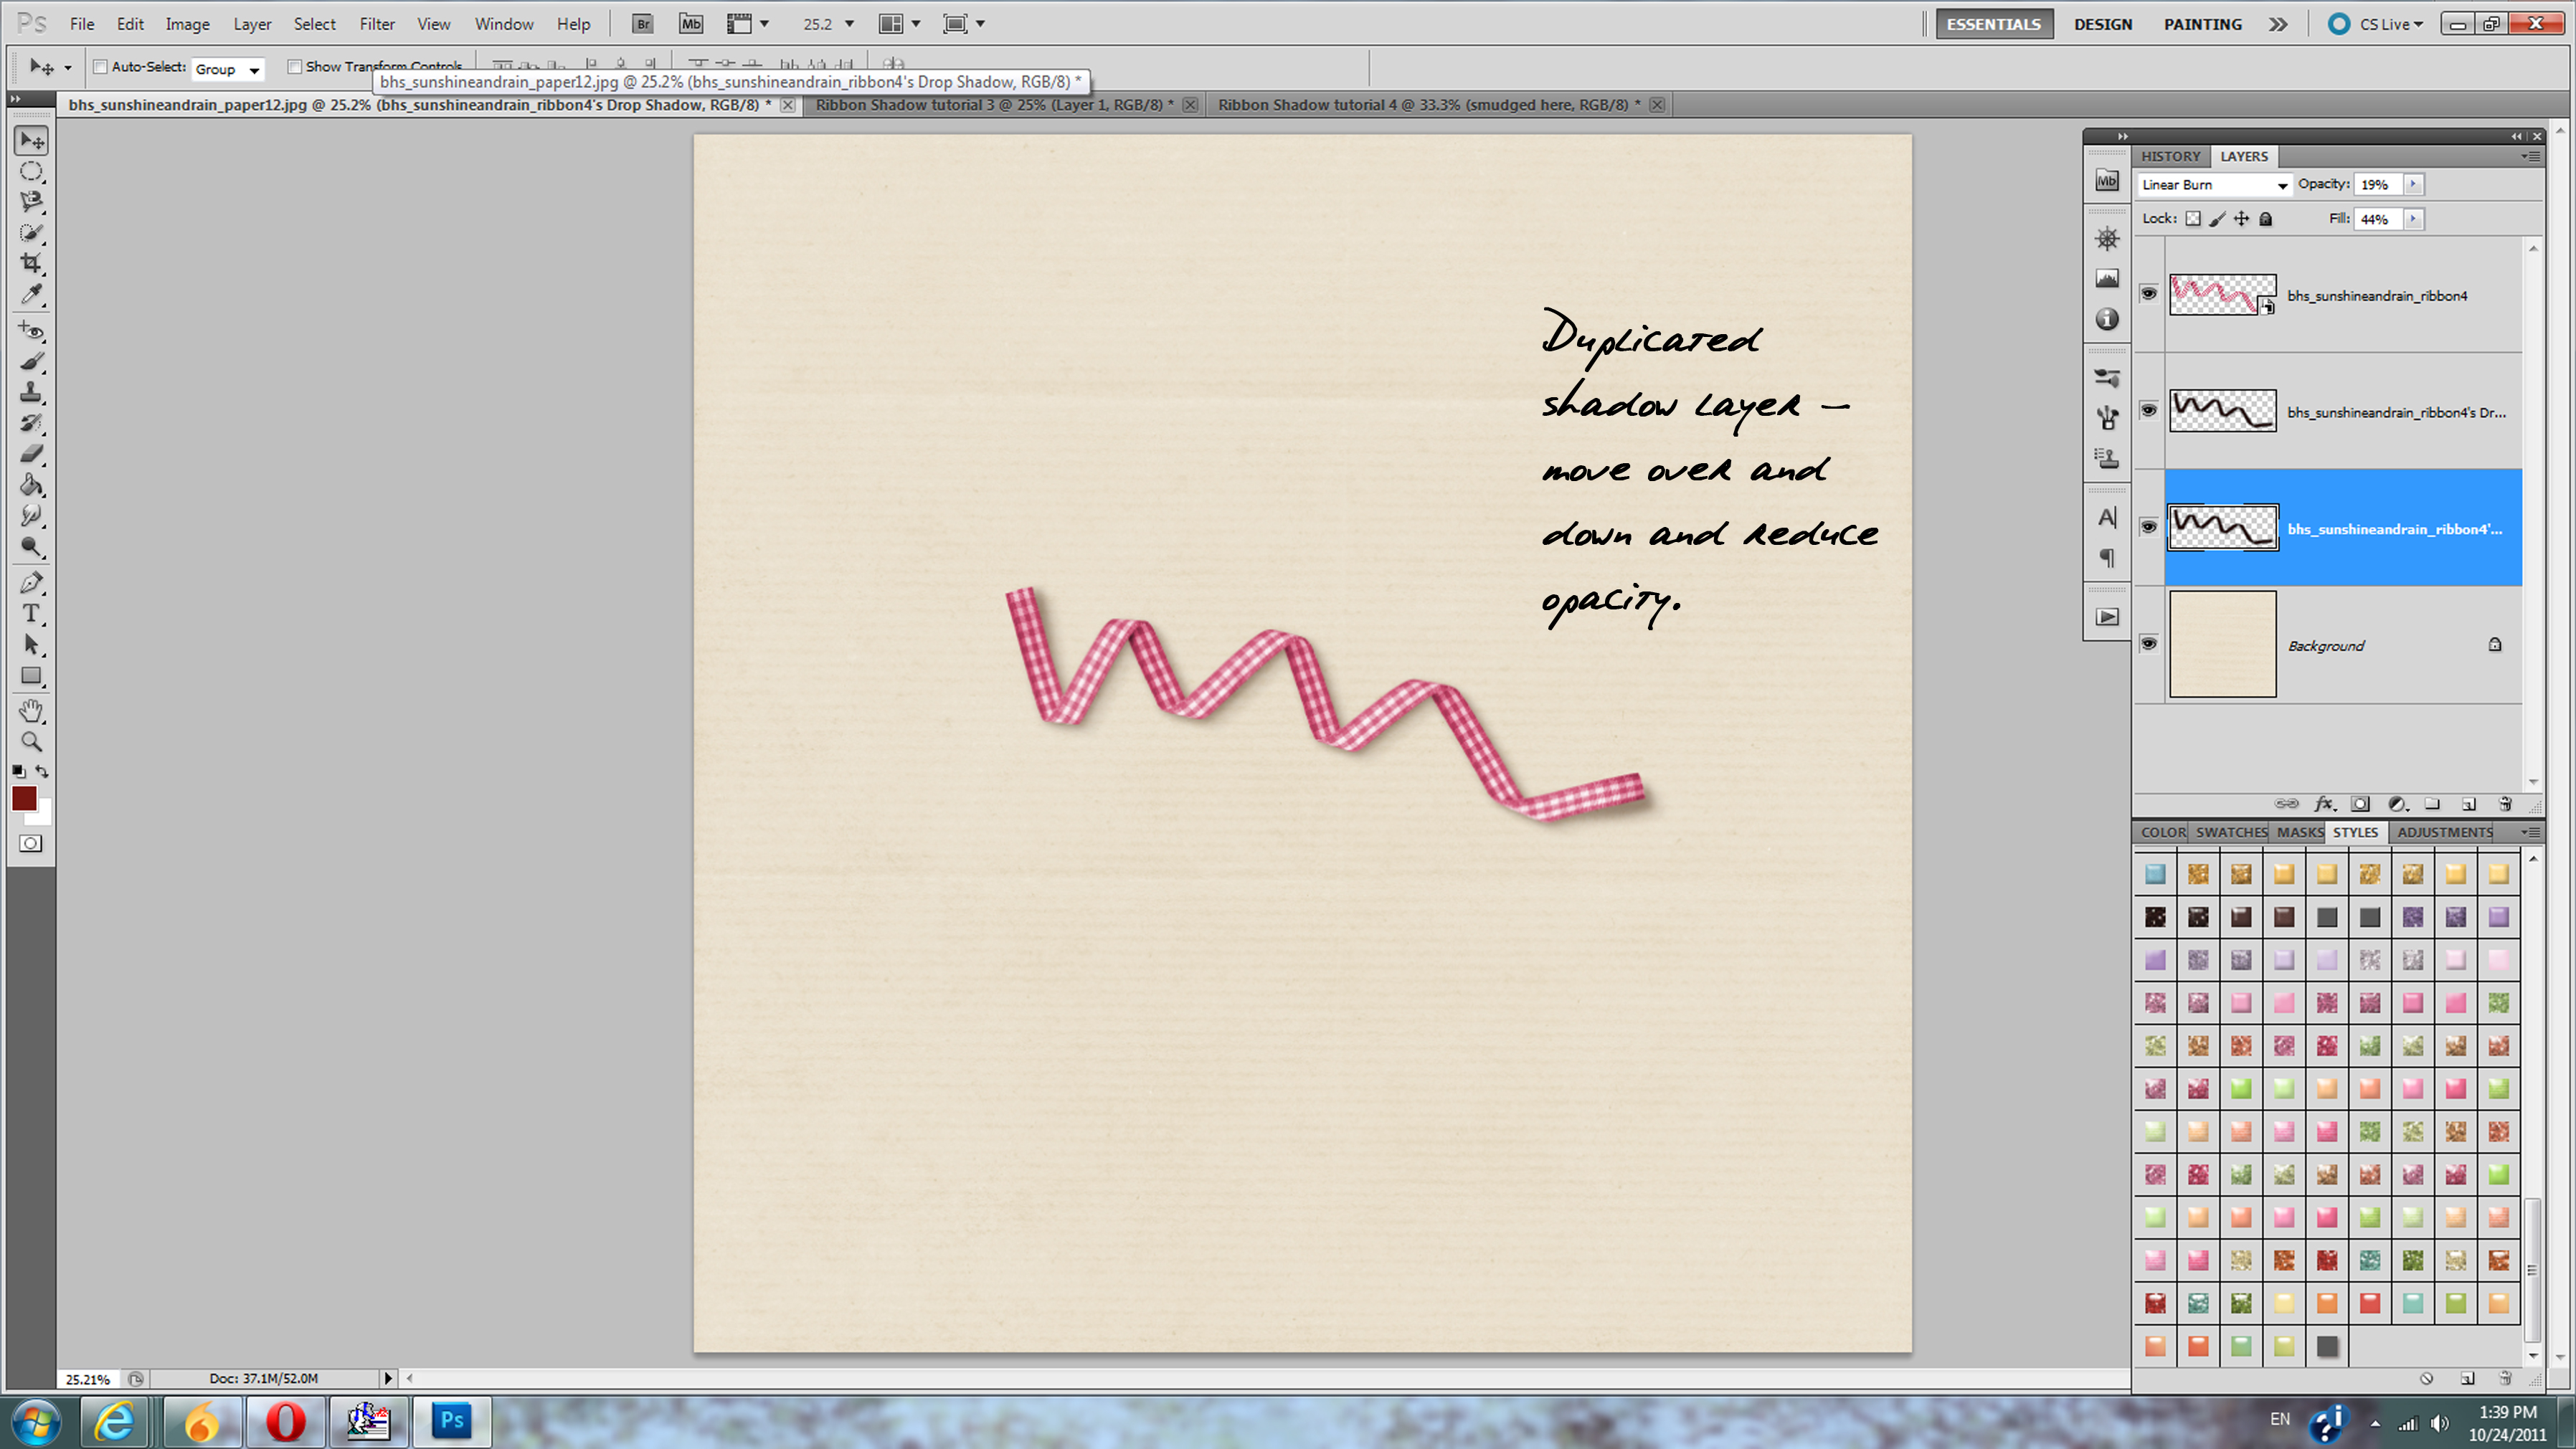
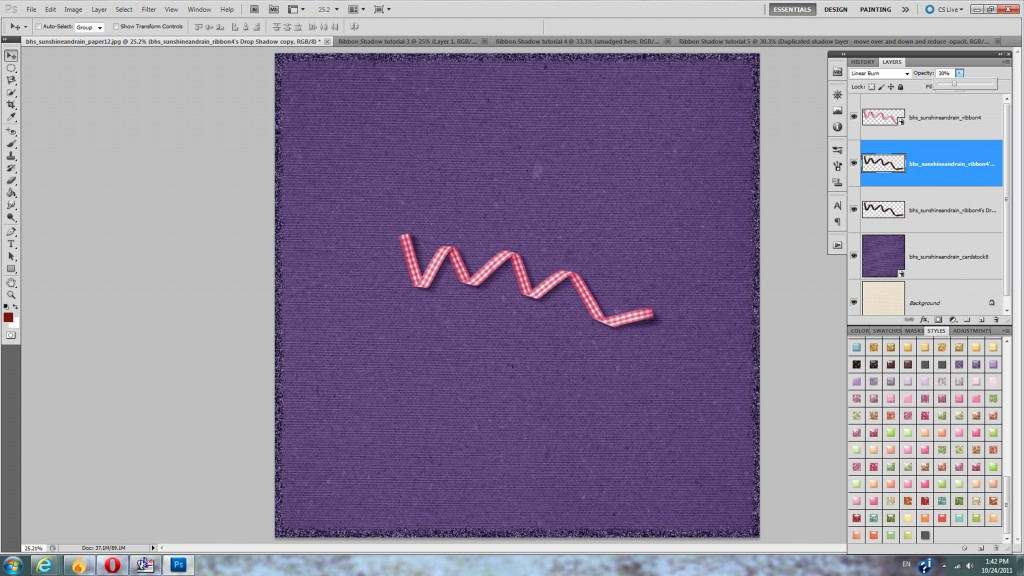
You can stop here, or you can keep going and add even more interest to your shadow.  At this point, the shadow looks pretty darn good.  But I want it to look even prettier.  So, with my shadow layer selected, I hit ctrl J to duplicate the layer (or you can right click and select duplicate from the menu).  Then I select my new layer, and I adjust the opacity to about 50ish%.  Then select the move tool (arrow), and use your arrow keys to click over 4 or 5 pixels to the right and then 4 or 5 down. If you aren’t using these shadow styles, your shadow may be going in a different direction, and then you’d just move your duplicate shadow layer over in the direct your shadow is going.  I Just find doing this gives my ribbon a bit more umph.  You want to adjust your opacity till it is pretty light, but still there.  And that is it!  Now your ribbon looks like it is popping up off the page 🙂
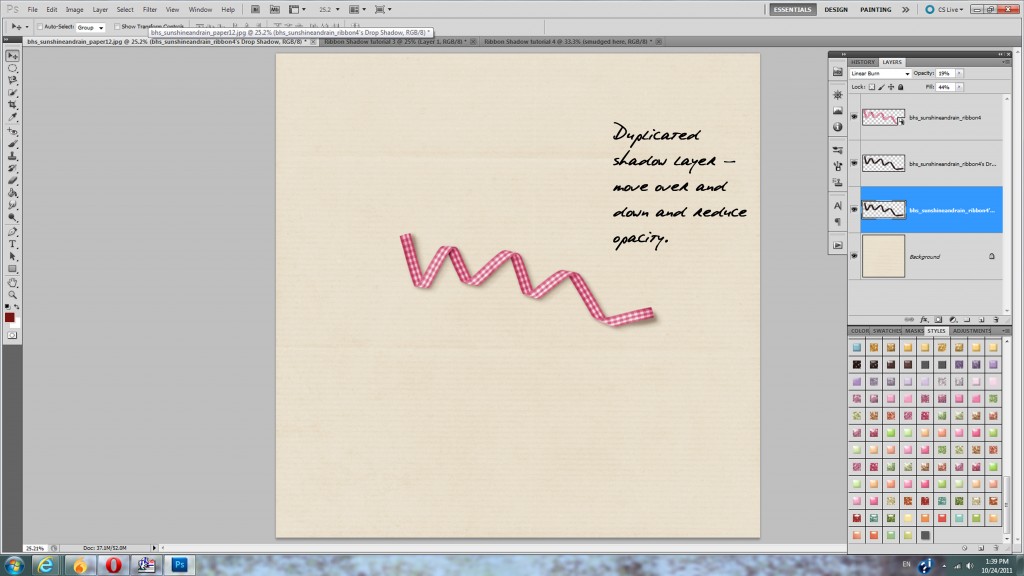
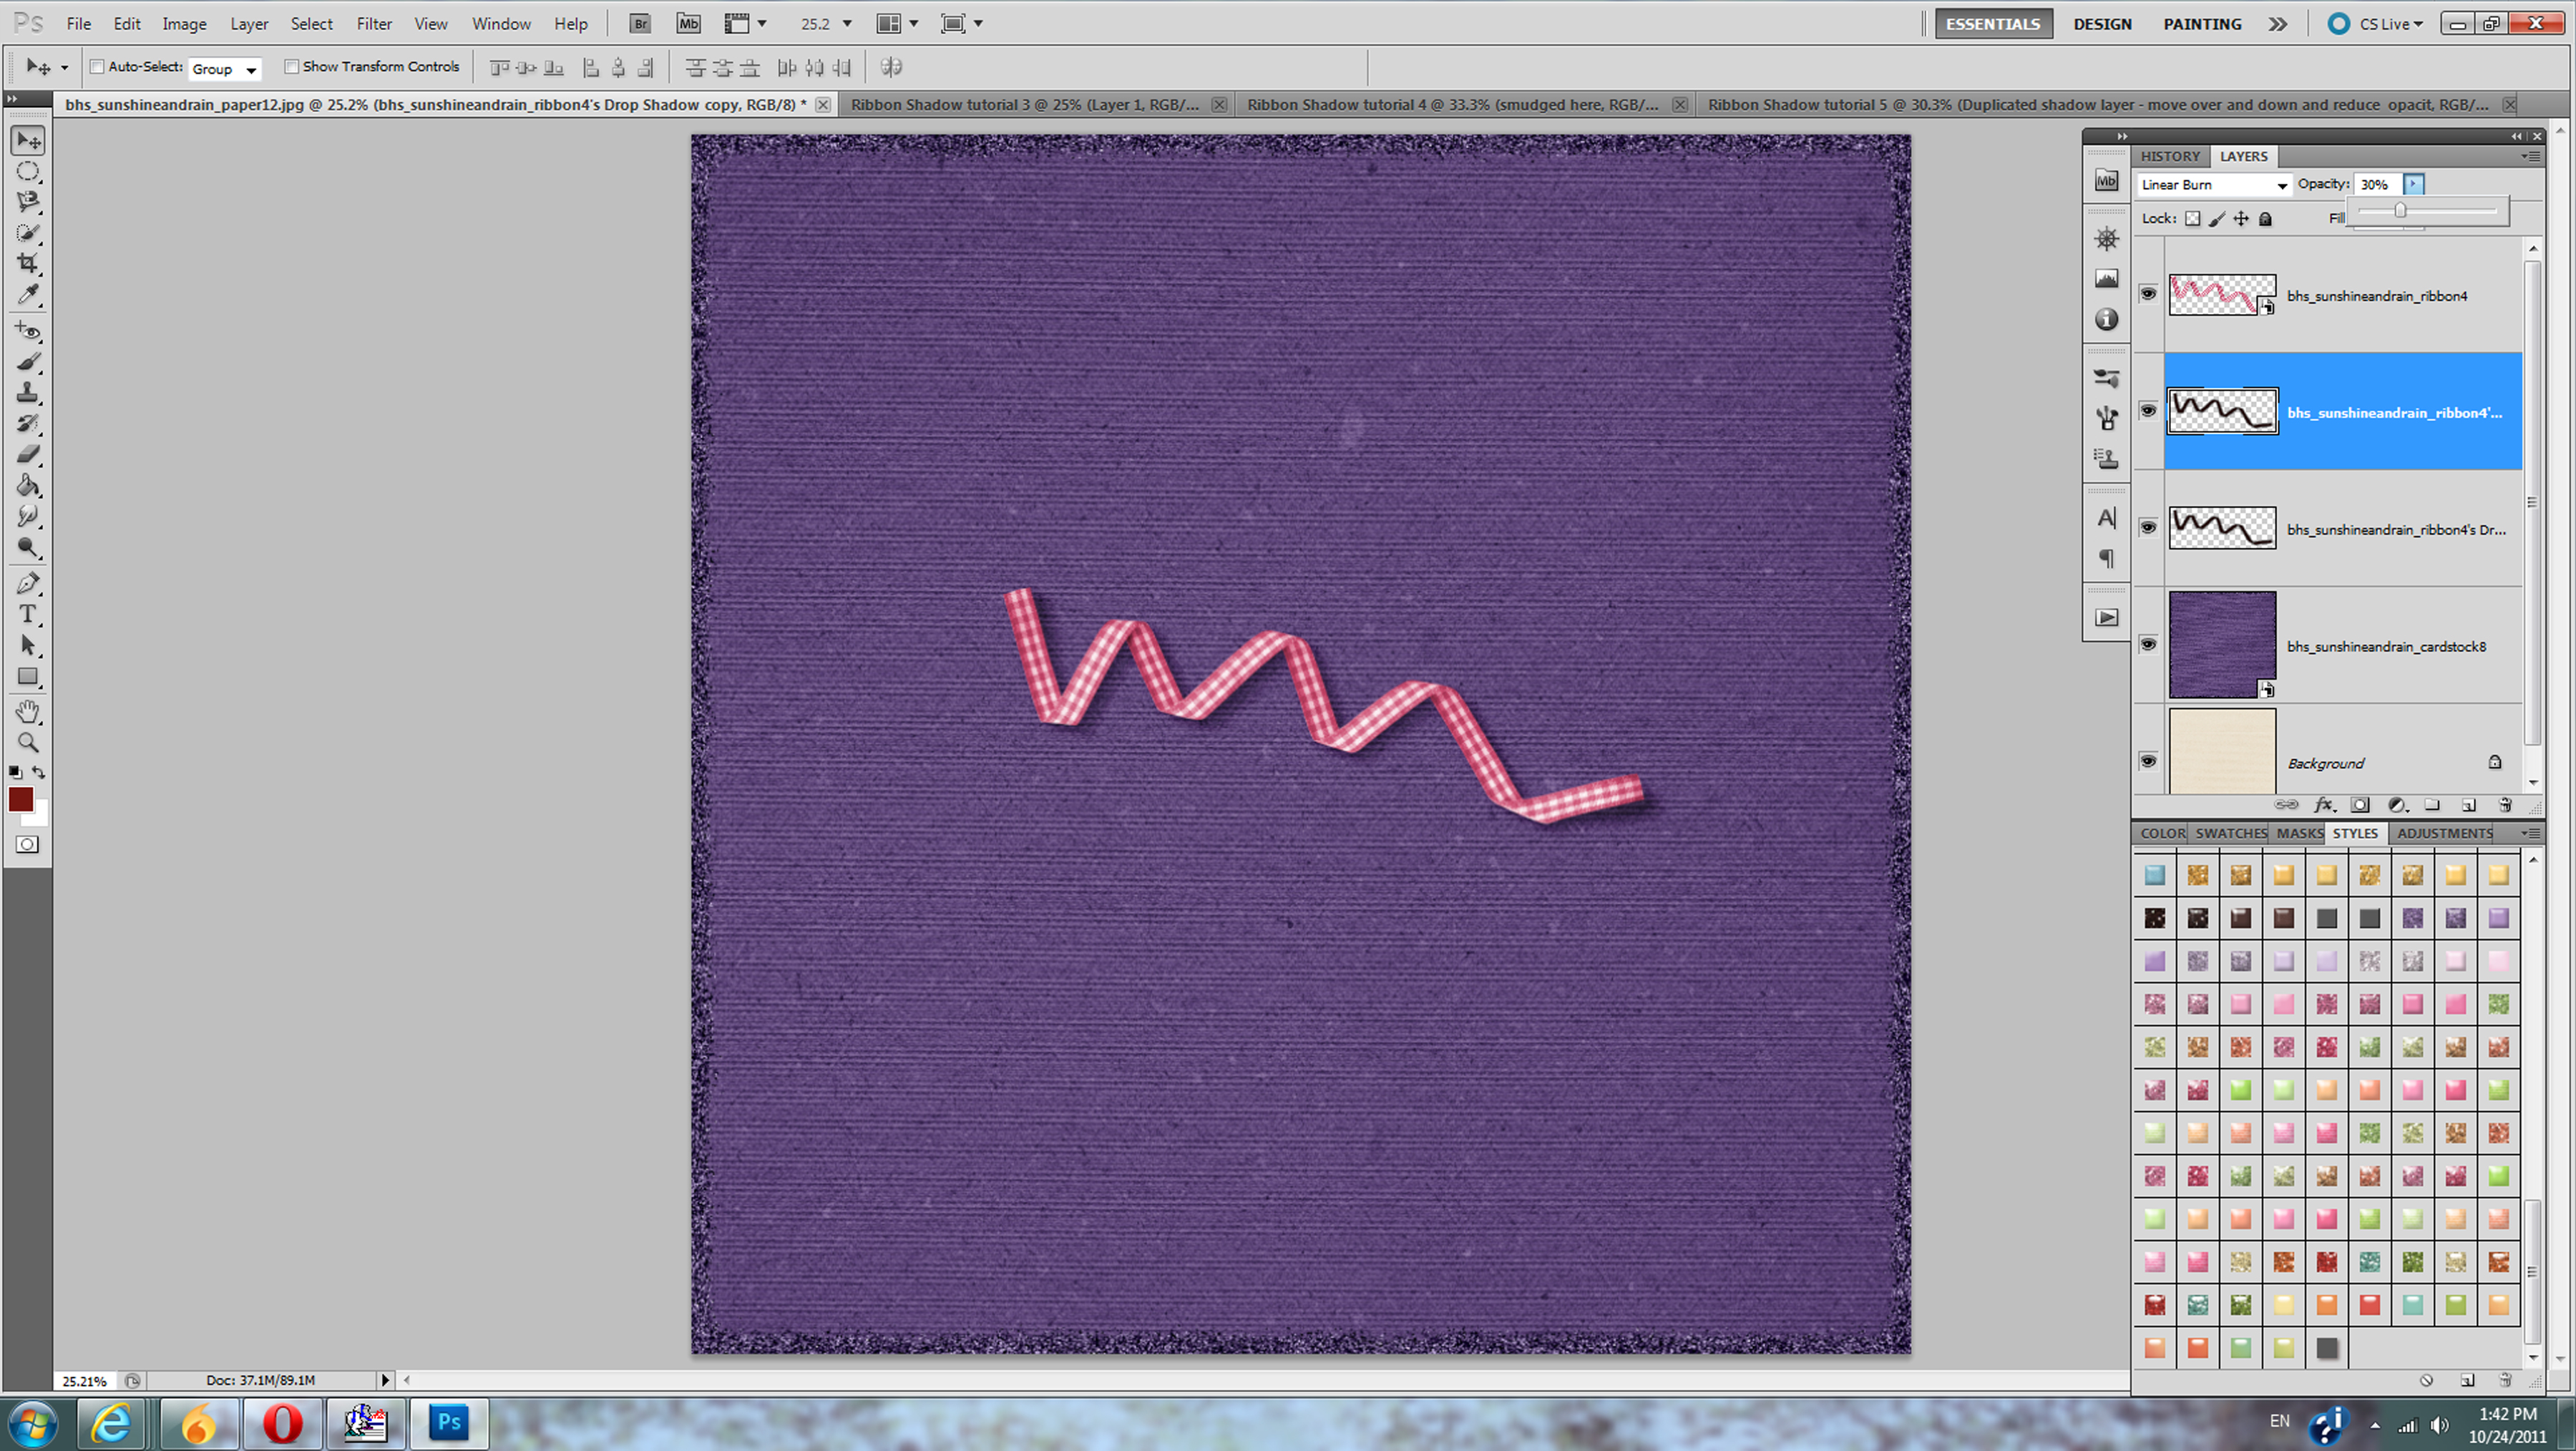
One more thing I want to show you is the same thing done on dark paper.  The only difference here is that my shadow is just set at a lower opacity.  For this I just chose the ribbon basic shadow dark paper style, then followed the steps above.
Well, that’s it for today’s tutorial!  I hope it was helpful!  Please leave a comment letting us know what other things you’d like to see tutorials for in the future.  Also, if you make a page using the provided shadows or this tutorial, please show us your page on the Blue Heart Scraps FB page!

Thanks!!
Layout Spotlight!

Oh, I am so late at posting this weeks layout spotlights. I want to show you some layouts/hybrids from the gallery that were created with Super Spooky and Super Spooky Bytes.


Do you want to have a chance to have your layout spotlighted on the blog? All you have to do is post your layouts to Blue Heart Scraps Gallery or leave a link here using any of her products. You never know when you’ll be spotlighted.


Sneak Peek Sunday!

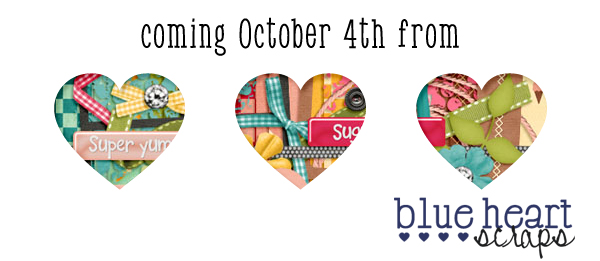
Good morning everyone!  Kelley here!  I’m so excited to be able to show you the sneak peek for JoyLynn’s newest kit, coming out exclusively at Polka Dot Plum November 1st! JoyLynn is guesting at the Plum during the month of November, so be sure to pop over there and check out her store and say hi. Anyway, back to the sneak peek! We are heading straight into the holiday season, and this kit is so perfect for it! Just look at the lovely colors!

Doesn’t it look amazing!!?! Would you like to win this kit? Be sure to leave a comment
below for a chance to win. Make sure you leave your email address here so if you win, we can contact you. Your comment will earn you 1 entry into the drawing. You can earn extra entries by making a post to your Facebook, Twitter or Blog. Simply leave a separate comment, with corresponding links, for each entry. You have until Monday at midnight CST to post your comment. JoyLynn will be back on Tuesday to announce the winner and show off her new kit!

“Oh So Spooky” Halloween Sale!

What better way to help celebrate Halloween than with an “Oh So Spooky” sale?!

My entire Brownie Scraps store is on sale for 50% off all weekend long!
(Sale prices good from Thursday, Oct 27th through Monday, Oct 31st).

Grab some great kits at incredible prices, including my Super Spooky Mega kit and Add-On:

You can check out those two kits, as well as the rest of my store here:

Blue Heart Scraps

Wednesday Template Freebie!

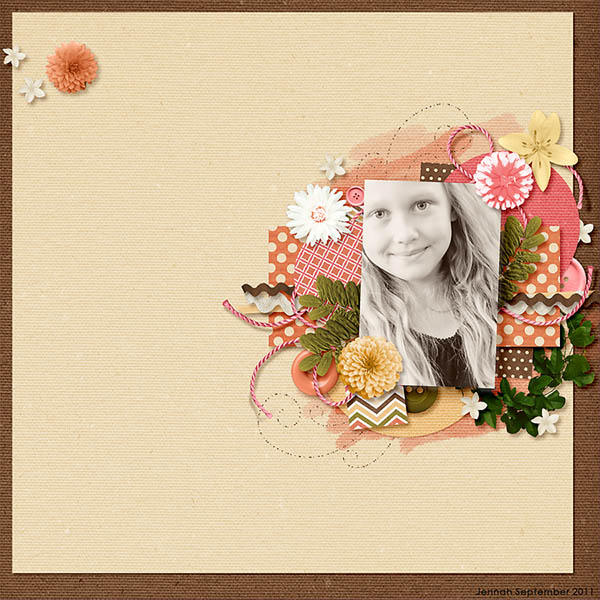
Hey everyone! Kelley here with a fun template freebie for you. I had so much fun creating this, and I really hope you all have fun with it! Can’t wait to see some layouts made with it. I made a couple pages with it so far, and here is one of them using Secret Garden:

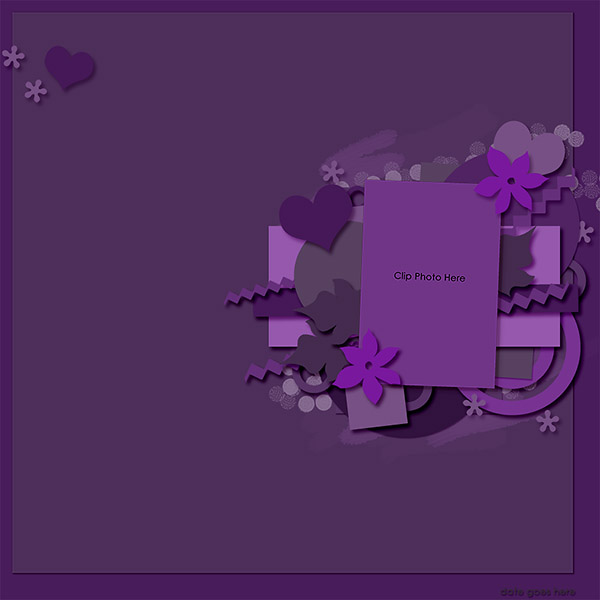
And here is a preview of the template! Just click one of the images to download the template 🙂

 Download Here

Enjoy!!
Layout Spotlight!
Good Morning, Everyone! Crystal here (in Louisiana), and it’s a bit chilly this morning. I have a layout to share with you.

This LO was emailed to JoyLynn by Jenny.

Jenny used Smile by Blue Heart Scraps. You can purchase it from the Brownie Scraps Store. Click on the image below to see it in the store.

Do you want to have a chance to have your layout spotlighted on the blog? All you have to do is post your layouts to Blue Heart Scraps Gallery or leave a link here using any of her products. You never know when you’ll be spotlighted.


New Release & RAK Winner!

Today’s new release is full of yummy goodness…literally!  🙂  First released at my Scrapable guest store in August, Sweet Tooth is now available at Brownie Scraps for 25% off all day long!

Yum, yum, yum! Packed with lots of yummy goodness, Sweet Tooth is sure to feed your craving for beautifully delicious layouts! Kit comes packed with 18 sweetly textured papers (9 plain, 9 patterned), 40+ elements and 10 scrumptious word strips.

A few CT layouts to spark your creativity:

————————————————————-

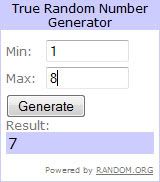
Thanks for your comments and entries into Sunday’s RAK contest to win a copy of Sweet Tooth for free.  I used Random.org to pick a winner.

Congrats, Candi!  I’ll email your coupon code to you shortly!  🙂

————————————————————-

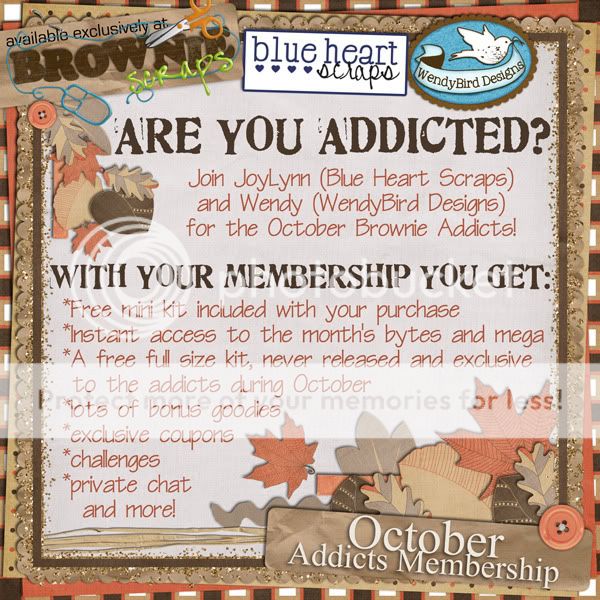
Have you picked up your October Addicts Membership yet?  This is a month you don’t want to miss out on, I promise!  🙂

The Membership is only $10, so be sure to grab it before it’s too late!

You can purchase your October Addicts Membership today by clicking here.

Sunday Sneak Peek

Morning everyone! Ari here with another sneak peek! It’s getting cold outside isn’t it?? Well at least here. This makes me scared that the winter will be brutal! Brr. I strongly dislike the cold! I’m sure you want me to stop rambling and get on to the Sneak Peek! Right, well this kit isn’t exactly new, but it was exclusive for JoyLynn’s month (er, two) at Scrapable! It will be added to her Brownie Scraps store as her time with Scrapable has sadly, come to an end!

Remember this kit?! If you don’t I bet you will Tuesday when you see the full preview (again!).  As always, we’re going to give you a chance to win this kit!! Just leave a comment here telling us what kit you believe this is. (Make sure you leave your email address here so if you win, we can contact you).  Your comment will earn you 1 entry into the drawing.  You can earn extra entries by making a post to your Facebook, Twitter or Blog.  Simply leave a separate comment, with corresponding links, for each entry.  You have until Monday at midnight CST to post your comment.  JoyLynn will be back on Tuesday to announce the winner and show off her new kit!

DST October Blog Train Time!

It’s time for the DST October Blog Train to leave the station, and hopefully you’ll find some amazing goodies to download during your ride.

You should have gotten here via Mad Genius Designs, and your next stop on the train should be MagsGraphics.  However, if these links are not correct, or if you get lost along the way, you should be able to find a full list of this month’s participants here:  The Blog Train Blog.

I decided to go a bit low key with this train.  Since there was no theme this month, I wanted to try and do something that would fit best with a larger variety of the other portions.  So, I offer you my portion – Purple Polka Alpha:

Download Here

I liked the polka dot look of the alpha so much, I decided to make a matching plain and polka dot paper pack using all of the colors of the train.  To download it, visit my Facebook Fan Page here (if you don’t ‘like’ me yet, you’ll have to do so before you can download):

Blue Heart Scraps on Facebook!

Have a GREAT month!  🙂

New Releases & Monthly Challenge

In honor of this month’s October Addicts club at Brownie Scraps (which I am super excited to be hosting with Wendy of WendyBird Designs), I have two new releases for you today:  the Super Spooky Mega Kit

and the Super Spooky Bytes Add-On

You can pick up both kits for an incredibly low sale price this month ($4 and $2, respectively), or you can pick up an Addicts Club membership for October (for only $10) that allows you to pick up both of those kits for free, plus another exclusive full size kit (previewed below) – as well as all of Wendy’s wonderful hybrid goodies – plus freebies and coupons all month long!

—————————————————————————-

I’m hosting the October Indulgence Challenge at Brownie Scraps.  The challenge is simple – I provide you with a free mini kit and you create a layout using every paper/element in the mini kit.  Pretty simple, right?  Be sure to check the challenge out here:  October Indulgence Challenge at Brownie Scraps

Preview of this month’s Indulgence Challenge mini kit:
Image

I’d love to see some amazing layouts from you this month!   🙂